How to Add Google Authentication in ASP.NET Core Application
 |
Vivek Jaiswal |
15586 |
{{e.like}} |
{{e.dislike}} |
Watch Video
Introduction:
In this article, we have discussed, How to use Google Authentication in ASP.NET Core. Here we authenticate our ASP.NET Core app with a Google account without the use of ASP.NET Core identity.
Follow the below steps to implement Google Authentication in the ASP.NET Core application.
Step1. Create a project in Google Cloud Platform https://console.developers.google.com and choose the Credentials menu then create here OAuth Client Id.
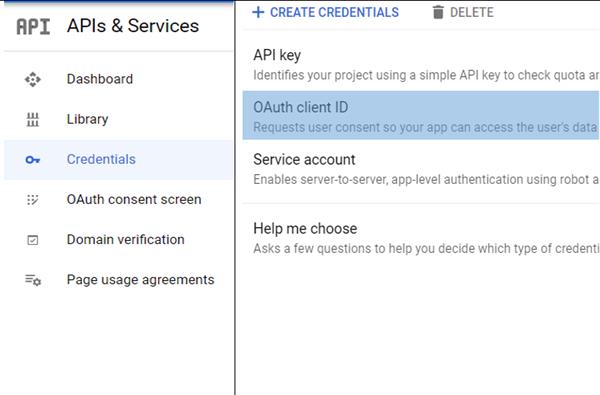
After click on OAuth Client Id select the Application Type as Web Application. Now enter the Name and Authorized Name URLs. Authorized Name URLs set to be as “{your-host/signin-google}”. The signin-google is handled by ASP.NET Core middleware, so we can enter this as the same. After saving the details below popup will show with a Client ID and Client Secret.
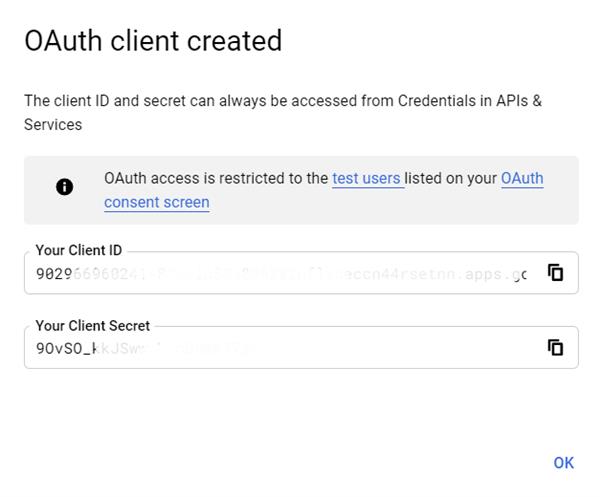
Step 2: Create the ASP.NET Core MVC application and add the NuGet package: Microsoft.AspNetCore.Authentication.Google, that is used to configure the Google Authentication in your application. Then store the Client ID and Client Secret in the appsettings.json file as below.
"Authentication": {
    "Google": {
      "ClientId": "Your Client ID",
      "ClientSecret": "Your Client Secret"
    }
  }
Step3: Now need to configure the ASP.NET Core Middleware, So to do this we made some changes in the ConfigureServices method in Startup.cs as below.
public void ConfigureServices(IServiceCollection services)
        {
            services.AddAuthentication(options =>
            {
                options.DefaultScheme = CookieAuthenticationDefaults.AuthenticationScheme;
                options.DefaultChallengeScheme = GoogleDefaults.AuthenticationScheme;
            })
            .AddCookie()
            .AddGoogle(GoogleDefaults.AuthenticationScheme, options =>
             {
                 options.ClientId = Configuration["Authentication:Google:ClientId"];
                 options.ClientSecret = Configuration["Authentication:Google:ClientSecret"];
                 options.ClaimActions.MapJsonKey("urn:google:picture", "picture", "url");
             });
            services.AddMvc().SetCompatibilityVersion(CompatibilityVersion.Version_2_1);
        }
In the above code snippet ClaimActions.MapJsonKey is used to get the profile picture of the user that login with a Google account.
Now add the below code into the Configure method of the Startup.cs
app.UseAuthentication();Next, we can decorate the controller or action method with an Authorized attribute that validates the user login status before access that controller or action method. If the user access without login then redirects the user to the login screen. When a user is authenticated then you can access the user details by User.Identity object.
Step4: After the user login with a Google account to the application, we can access the user details and create a button for Login and Logout on razor pages with the below code snippet.
<p><a asp-area="" asp-controller="Home" asp-action="Login">Login</a></p>
<ul>
    @if (Context.User.Identity.IsAuthenticated)
    {
        <li>
            <a>Hello @User.Identity.Name</a>
        </li>
        <li>
            <a asp-controller="Home" asp-action="Logout">Logout</a>
        </li>
    }
</ul>
Step5: Now create the method for Login with Google and one method for getting the response from Google after login.
       public async Task Login()
        {
            await HttpContext.ChallengeAsync(GoogleDefaults.AuthenticationScheme, new AuthenticationProperties()
            {
                RedirectUri = Url.Action("GoogleResponse")
            });
        }

        public async Task<IActionResult> GoogleResponse()
        {
            var result = await HttpContext.AuthenticateAsync(CookieAuthenticationDefaults.AuthenticationScheme);
            var claims = result.Principal.Identities
                .FirstOrDefault().Claims.Select(claim => new
                {
                    claim.Issuer,
                    claim.OriginalIssuer,
                    claim.Type,
                    claim.Value
                });
            return Json(claims);
        }
In the above code snippet, we can see that the Login method redirect the user to Google for authentication after that GoogleResponse method returns the user details in JSON format.
Step6: Now need to write the below code for Logout functionality
 [Authorize]
        public async Task<IActionResult> Logout()
        {
            await HttpContext.SignOutAsync();
            return RedirectToAction("Index");
        }
So use the above methods your can configure Google authentication in ASP.NET Core application without using ASP.NET Core Identity.
You can download the source code for the article here.
If your find this article useful, please share it with your friends.
Comments
|
|
|
| Follow up comments |
| {{e.Name}} {{e.Comments}} |
{{e.days}} | |
|
|
||
|
|
||
| {{r.Name}} {{r.Comments}} |
{{r.days}} | |
|
|
||