How to upload files in ASP.NET Core MVC
 |
Vivek Jaiswal |
17949 |
{{e.like}} |
{{e.dislike}} |
In this article, I will discuss How to upload file in ASP.NET CORE MVC. In previous version of ASP.NET an uploaded file was performed by instance of System.web.HttpPostedFileBase, but in the ASP.NET Core this has been replaced by IFromFile interface. This is found under the Microsoft.AspNet.Http namespace. Recall this IFromFile from an Http request to action method parameters. This simply represents a file sent with an HTTP request. IFromFile represent a file that is sent from client to server along with HTTP request.
When file uploading perform via this method, one important thing is that file entirely uploaded on serer before execution hits you action method. It means that server need to hold file temporarily until decide where to push it.
So Now follow the below steps to upload file on server in ASP.NET Core MVC.
Create Application
First off, let’s create an ASP.NET Core MVC project in Visual Studio.
Open Visual Studio 2017 》New 》 ASP.NET Core Web Application 》 MVC
Add Controller to the application:
Right click on controller folder and add controller class as HomeController.cs , here we will write business logic for performing file upload.
Now write the following code snippet inside HomeController.
using System;
using System.Collections.Generic;
using System.Diagnostics;
using System.Linq;
using System.Threading.Tasks;
using Microsoft.AspNetCore.Mvc;
using FileUploadCore.Models;
using Microsoft.AspNetCore.Http;
using System.IO;
namespace FileUploadCore.Controllers
{
    public class HomeController : Controller
    {
        public IActionResult FileUpload()
        {
            return View();
        }
        [HttpPost]
        public async Task<ActionResult> FileUpload(IFormFile file)
        {
            await UploadFile(file);
            TempData["msg"] = "File Uploaded successfully.";
            return View();
        }
        // Upload file on server
        public async Task<bool> UploadFile(IFormFile file)
        {
            string path = "";
            bool iscopied = false;
            try
            {
                if (file.Length>0)
                {
                    string filename = Guid.NewGuid() + Path.GetExtension(file.FileName);
                    path = Path.GetFullPath(Path.Combine(Directory.GetCurrentDirectory(), "Upload"));
                    using (var filestream = new FileStream(Path.Combine(path, filename), FileMode.Create))
                    {
                        await file.CopyToAsync(filestream);
                    }
                    iscopied = true;
                }
                else
                {
                    iscopied = false;
                }
            }
            catch (Exception)
            {
                throw;
            }
            return iscopied;
        }
    }
}
In the above code, I have created two method for FileUpload. One method for HttpGet and other is for HttpPost, Which also has the parameter as IFormFile. Here Client sent file as Http Request. In this example I have created folder(Upload) to save files inside the current project directory.
IFromFile share some properties and methods with their predecessors. This have a Length property instead of ContentLength, there is also a Name property. This return the value of name attribute of the uploaded file. In this code file has been saved to specified location asynchronously using the CopyToAsync method.
Add Views to the Application:
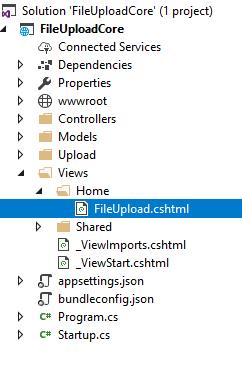
To add Views for controller class, we need to create folder inside Views folder with same name as Controller class (Here name as Home) and then add Views to that folder.
To add Views file, Right click on Home folder inside Views folder and then select View name as FileUpload.cshtml.
Our Views folder look like this.
Now write the following code snippet inside to the FileUpload.cshtml
<form method="post" enctype="multipart/form-data" asp-controller="Home" asp-action="FileUpload">
    <div class="form-group">
        <div class="col-md-10">
            <p>Upload File</p>
            <input type="file" name="file" />
        </div>
    </div>
    <div class="form-group">
        <input type="submit" value="Upload file"/>
    </div>
    <div class="form-group">
        <span>@TempData["msg"]</span>
    </div>
</form>
To enable file uploading, you need to ensure that form method is set to post and the enctype type as multipart/form-data. In this example we take advantage of HTML5 multiple attribute on the file input which enables multiple file upload via single control.
Now run the application.
Thanks.
If you like this article, share with you friends.
Comments
|
|
|
| Follow up comments |
| {{e.Name}} {{e.Comments}} |
{{e.days}} | |
|
|
||
|
|
||
| {{r.Name}} {{r.Comments}} |
{{r.days}} | |
|
|
||